Sail Trim & Mast Bend

The Importance of Sail Trim in Sailboat Racing

To do well in sailboat racing, you need to know more than how to sail; you need to know how to sail really well. Sailing well means not only understanding how to sail, but how to trim the sails to drive the boat at top speed under a variety of wind and wave conditions. In many cases, poor performance in sailboat racing can be traced to not understanding the finer points of sail trim. USITA Long Beach recognizes this and offers classes in basic and advanced sail trim. Classes are conducted informally, generally by a more experienced sailor offering to crew for a skipper who is interested in improving their sailing skills. The following discussion provides several concepts which must be mastered to race a Tempest really well. Needless to say, the concepts apply to a wide variety of racing sailboats, not just Tempests.
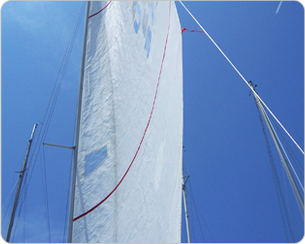
A sail boat is shown against the blue sky.

The Role of Mast Bend in Sail Trim

Although it may come as a surprise to some people, a class on sail trim must start with a discussion or class on mast bend. This class should be conducted at the yacht club before the boat is rigged. For maximum effectiveness, the instructor should conduct a demonstration using a bathroom scale and the top batten from a Tempest mainsail, which is very long and slender. With the scale placed on the ground, students should take turns holding the batten vertically, with the bottom end of the batten placed on the scale where a person would normally stand. The palm of the free hand is placed over the top of the batten, and downward pressure is applied on the batten.

Initially, the bathroom scale registers the downward pressure on the batten by showing an increase in “weight.” However, as the downward force increases, the reading on the scale reaches a maximum and stops increasing, even if the downward pressure on the batten causes the batten to bend dramatically in the middle. This demonstration is important as it points out that increasing rig tension in a boat will cause an increase in the tension in the stays and shrouds up until the point where the mast goes “out of column,” mimicking the bending batten. Once the mast goes out of column, further increases in rig tension will not cause an increase in tension in the stays and shrouds.

The demonstration allows everyone to see that there are limits to reducing the sag in the forestay when going upwind in a breeze by increasing rig tension. It also demonstrates that increasing rig tension reduces the stability of the mast and makes it more susceptible to bending by the pressure of the wind on the sails or the pull of the main sheet. Sailmakers are well aware of the inter-relationships between rig tension, mast stability and forestay sag. For example, when a jib is designed, the sailmaker will allow for a certain amount of forestay sag when calculating the optimum luff curve for the sail.

Determining the Optimum Rig Tension

Finding the optimum rig tension is a trial-and-error procedure. Whether you have an older Mark I or a newer Mark II Tempest, disconnect the mast lever from the mast. Also, if you have one, make sure the backstay is disconnected. Now, you need to tension the rig. On a Mark I, this is accomplished by tensioning the forestay or closing the shroud lever located in one or both of the shrouds. On a Mark II, you can increase shroud tension alone or increase both shroud tension and forestay tension.

With the rig tensioned, stand in the boat facing forward, just aft of the mast and grab the mast at shoulder height with one hand. Check how much effort is needed to bend the mast fore and aft. Increase rig tension and note how much easier it is to bend the mast. You will note that as you increase rig tension, it will become increasingly easier to bend the mast. Here’s where the trial-and-error procedure comes in. Continue increasing rig tension until there is no noticeable increase in the ease with which you can bend the mast. At this point, the mast is behaving like the batten on the bathroom scale at the end of our experiment. Although we are applying a greater load on the mast, causing it to become increasingly less stable, there is no significant increase in the tension in the shrouds and forestay.

To quantify your subjective analysis, measure the tension in the shrouds or forestay using either a standard Loos tension gauge or the more expensive Harken digital tension gauge. By keeping track of shroud (or forestay) tension as you increase rig tension, you will quickly see the point where increasing rig tension results in only a modest increase in shroud (or forestay) tension, but the mast becomes really bendy or unstable. The goal is to find that point where you have a relatively high rig tension without making the mast so bendable that it has very little vertical stability.

Measuring Mast Rake

After you are comfortable that you know how to tension the rig and find that trade-off between rig tension and mast stability, you need to measure mast rake. With your head adjacent to the mast partner, sight up the mast to make sure it is straight. Unless the mast lever or backstay is connected to the mast and under tension, the mast should be straight. Attach the loop end of a 50-foot tape measure to the main-halyard shackle and raise the halyard to its normal, fully-raised position. Using the tape measure, measure the distance from the top of the mast to the edge where the stern deck meets the transom.

Based on measurements collected on top Mark I boats, the optimum measurement should be between 29 feet, 8 inches and 29 feet, 9 inches. If your mast rake does not fall within this measurement, remove all rig tension and adjust the length of either the shrouds or forestay. Re-tension the rig, and re-measure the mast rake. Continue doing this until you get the proper mast rake.

Pre-bending the Mast

Because rig tension causes the mast to become unstable or “bendy,” the right amount of pre-bend is critical. A good way to understand this is to use the following thought experiment. You are hiking along a beautiful mountain trail, and you come across a stream that you want to cross without walking through it. You find a wooden board long enough to cross the stream and support it on the banks on either side of the stream.

As you walk on the board above the stream, it bounces up and down. Now, envision hanging a heavy weight from the midpoint of the board. Naturally, the board is going to bend downward. The heavier the weight, the more it will bend. Now, when you walk across the board, the board is much more stable, and there is less bouncing. The reason for this is that by hanging a weight on the board, you are “preloading” the board. Because the board is preloaded, the oscillating, vertical load caused by your walking across the board has less impact on the board. The heavier the weight that you hang from the board, or the greater the preload, the more this is true.

Without applying pre-bend to a mast under load, it will behave much like the board placed across the stream. As a boat moves through the water, it is periodically slowed by waves. Each time the boat is slowed, the force of the sail pushing forward on the mast increases, causing the mast to bend. When the boat picks up speed, the force of the sail against the mast is reduced, and the mast straightens up. As the boat moves through the ocean, the mast is constantly in motion, either bending when the boat pushes into a wave or straightening as the boat accelerates back to full speed. So, now that we know we need to pre-load the mast, how do we do it?

On a Tempest, the mast is preloaded in one of two ways. On the older design Mark I, the situation is relatively simple. We use the mast lever to bend the mast, typically one mast-width. On the newer design Mark II, the situation is more complicated. We can tension the shrouds, which push the spreaders forward, bending the mast. Alternatively, we can bend the mast with the mast lever.

Once again, your sailmaker is well aware that you need to pre-bend the mast to stabilize after the rig has been tensioned. Clearly, to get the most out of your mainsail, you need to know how much mast bend your sailmaker factored into the luff curve of this sail. As a rule of thumb, this is one mast-width.

Changing Gears and Using Benchmarks for Optimum Sail Trim

There is a surprising similarity between driving a manual-shift car and sailing well. Simply put, you need to know which gear to be in to obtain maximum performance. Giving classes in “changing gears” is best conducted by taking someone out on a boat, but it can be done at the dock, using a fully-rigged boat, if the class contains more than one or two people.

Ideally, the class will start on a day when the wind is light, with a forecast for increasing wind as the day unfolds. Working aft from the forestay, the instructor will show the student how to:

  • Set the position of the jib-lead car to obtain the optimum shape of the jib luff
  • Use the traveler car, mainsheet tension, backstay and telltales attached to the leech of the mainsail to obtain the optimum twist in the leech of the mainsail
  • Use the Cunnigham adjustment to control the point of maximum draft in the mainsail
  • Use the outhaul to control draft in the foot of the mainsail

For convenience, let’s refer to sailing in light air as “sailing in first gear.” Once proper sail trim has been established in first gear, the skipper needs to be able to repeat all of the settings used to obtain the proper sail trim each time he is in first gear. To make this happen, the skipper must have “benchmarks” that he can refer to. These benchmarks can be as simple as colored stripes at strategic locations on critical control lines, numerical strips placed next to sliding fittings, lines drawn on the sails, the alignment of the leech of the main with backstay, the orientation of the battens, notes on the deck, or a complete notebook on what works best.

Remember the most important rule. The whole purpose of benchmarks is to facilitate trimming the sails, using settings that have been proven to work. To make this happen, the settings must be as easy as possible to follow and understand.

Now that you have mastered sail trim for light air, or first gear, we wave our magic wand, and the wind increases five to seven knots. We now have a medium wind, you are sailing in “second gear,” and our sail trim has to be adjusted. With the aid of an experienced skipper or sail trimmer, you will learn to drop the traveler a bit to leeward and increase the tension in the mainsheet and jib sheet. Once these adjustments have been made, note the positions of your benchmarks for second gear.

Waving our magic wand again, the wind increases five to seven knots, and you are sailing in “third gear.” Once again, with the help of an experienced skipper or sail trimmer, you will learn to make the adjustments needed for sail trim in third gear. Without a doubt, third gear is the most difficult to master. The sails will begin to develop more power than you and your trapezing crew can handle, and the boat will start heeling more than it should for optimum speed through the water. For a Tempest going upwind, the boat should not be allowed to heel more than about 10 degrees. Welcome to the wonderful world of sail trim when you need to depower.

Even experienced sailors are intimidated by the power generated by a Tempest in a full breeze. Rather than run the other way, you should see it as an opportunity to learn from the folks who have mastered the art. Fortunately, you have some very powerful tools at your disposal. First, your sailmaker has cut your mainsail to accommodate lots of mast bend. Secondly, you will be pleasantly surprised at how well a Tempest will sail when you oscillate between “feathering” upwind to the point where the jib just starts to luff, then bearing off just a bit to pick up speed.

I will save you the cost of many beers at the club bar and will reveal several tricks that the top Tempest skippers use when sailing upwind in a breeze. All you have to do is show up at a Tempest regatta or join the fleet. Before then, you will learn an incredible amount by reading The Sandbag, which is the best guide to purchasing, owning, rigging and racing an International Tempest ever written.

If you are still reading at this point, congratulations for being persistent. You will need to be persistent to become a good sailboat racer. Hopefully, the above information has wet your appetite to learn more. Bring all of your questions to the next regatta at the Alamitos Bay Yacht Club or contact the USITA Long Beach fleet, using the information provided in the “Contact Us” section of this website.